Keck Lab Usage
Keck Lab Usage Guidelines
| When using the Keck Lab, please leave it as you found it. Specifically,
if you change the settings of any cameras or PCs, please return them to their
original configuration when you are finished. The Keck Lab was not
designed to be reconfigured easily, so removing the cameras from the original
mounts is not recommended. In the past, doing so has resulted in taking
many hours before getting the system working properly again.
All changes to the Keck Lab should be mailed to kecklab@umiacs.umd.edu. |
Data Acquisition
Using the tools described on the rest of the page, data acquisition typically consists of the following steps in some similar
order:
- Make sure cameras are ON and connected properly.
- Point and focus cameras.
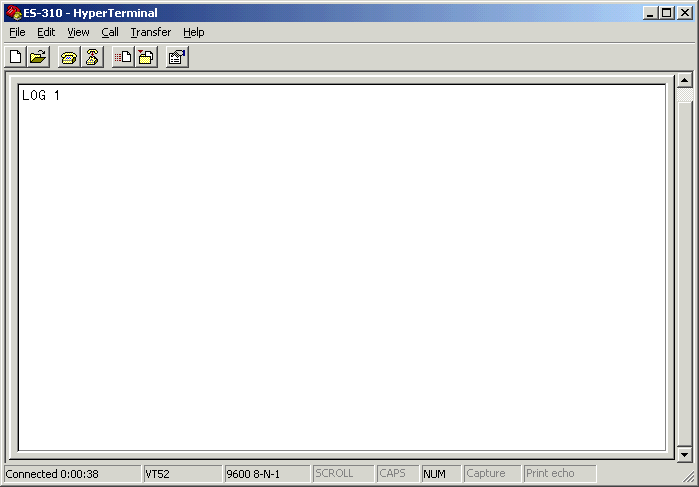
- Adjust camera settings using HyperTerminal.
- Capture and inspect test sequence. Repeat steps 2 and 3 until you are
satisfied with your images. If there are actual problems capturing, see
below.
- Capture any applicable calibration data (calibration frame, LEDs, color
grids, background images, etc.).
- Capture actual data.
NOTE: Since any changes to the lab setup could ruin your calibration and
render your data useless, you are well-advised to be careful to not
accidentally alter the lab setup between capturing calibration data and
actual data.
- Collect data and clean up. Since storage on the Keck PC's are limited,
please do not leave data on them. You can store your data on tape or burn it
onto CD's, but please remove your data from the Keck machines within a
reasonable amount of time.
See the Frequently Asked Questions for resolutions to
common problems encountered during data acquisition. If your problem is not
listed, then send mail to
qian@cs.umd.edu.
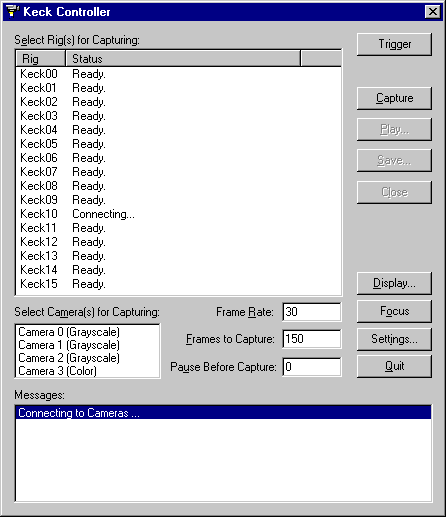
The Keck Controller provides a versatile interface for using the cameras in
the Keck Lab. It supports the following operations:
During operation, the Trigger button reflects the status of the sync
signal. When the sync signal is being generated, the button is depressed. The
sync signal is automatically controlled by the other operations of the Keck
Controller. However, should the need arise, the Trigger button also acts
as a manual switch to manually control the generation of sync signals.
The Keck Controller uses the Keck Server, a custom DCOM server running
remotely on each Keck PC, to perform the camera operations. The controller makes connections with each of the
camera PCs, and sends and retrieves messages and images. The ICamera interface
used for the Keck Server is:
- HRESULT SetDcfFile([in, string] char *dcf);
- Sets the Matrox DCF file.
- HRESULT AllocBuffer([in] BOOL cameras[4], [in] long numFrames);
- Allocates the specified number of image buffers for the specified
cameras.
- HRESULT ReleaseBuffer();
- Releases all previously allocated image buffers.
- HRESULT StartCapture();
- Starts capturing; returns when all the image allocated buffers are
filled.
- HRESULT SaveCapturedSeq([in] long format, [in, string] char *fileName);
- Saves the captured sequence with the given filename in the specified
format.
- HRESULT GetCapturedImage([in] long cameraNumber, [in] long
imageNumber, [out] char image[644*484]);
- Returns the specified captured image.
- HRESULT GetLiveImage([in] long cameraNumber, [out] char image[644*484]);
- Captures and returns a live image.
In the future, the Keck Server can be customized to perform other tasks (such
as locating LED points).
Images can also be captured by executing lc3 remotely on each Keck camera PC
to capture images to memory and save them to disk.
lc3 has the following command-line:
c:\bin\lc3 cams num_frames dcf_file save_name
- cams
- the cameras used to capture (any combination of the four cameras
0-3)
- num_frames
- number of frames to capture
- dcf_file
- the Matrox DCF file to use (es310_60.dcf for frame rate higher than
30, and es310_30.dcf for frame rate 30 and below)
- save_name
- save location for the captured images, given by the path and
sequence name (d:\test\cap would be saved as d:\test\cap.#.####.tif)
- The directory specified need to be created beforehand on each Keck
PC used or the operation will fail.
Typically, lc3 is executed in batch to capture from multiple rigs. The batch file
lc3_all.bat shows how to use lc3. The general procedure for capturing
video is:
- Start (the old) Keck Controller (if the frame rate is changed, restart
Keck Controller)
- Run lc3_all.bat (or your own version that selects the desired cameras)
- Press "Capture" in Keck Controller
The Kodak ES-310 camera parameters are set using the RS-422 bus, which is
connected to the keck16 controller via a Blackbox RS485 controller. A
HyperTerminal configuration "ES-310" is available on the desktop of
keck16. Use HyperTerminal to change camera settings such as exposure
(EXE).

Use the LOG command before communicating to any camera (which are
numbered 1-64). The document ES310_UM.PDF
describes all camera features and parameters, and Patrick's
Calibration Notes describes the commonly used parameters.
The PC keck16 has a Quantum 35 GB Digital Linear Tape drive installed, which
is used to save and retrieve data from the Keck computers. Use the Backup
program to save and retrieve data. The drive transfers data at 5MB/s, so a
writing a complete tape takes about 2 hours.
The color cameras in the Keck Lab captures images using Bayer color filter
mask as shown below. See the specification for more
details.

The ImgTool application performs color interpolation and
converts the captured "grayscale" TIF images to true color BMP images.

Select "Auto" to automatically determine whether an
image is color or grayscale by using image contrast. Select "Color" to
convert to color BMPs. Select "Grayscale" to convert to grayscale BMPs.
Check "Remove TIF" to have the original TIF files removed after
conversion. Finally, click the "Convert to BMP" button and select all
of the TIF images to be converted, and ImgTool will do the rest.
After installing MIL 6.0, you need to install the latest drivers, which are
located in "\\degas\archive\cameras\kodak\es310\latest drivers". Once
this is done, the ReservedHostSpaceForLcBuffers in genesis.ini should be set to
0x70000. Each computer (keck00-keck15) has 1GB of RAM, and is setup so
that the upper 896MB is available for capturing to memory (Windows NT 4.0 uses
128MB). Alternative NT hardware configurations would allow different
memory configurations.
The uninstall feature for MIL 6.0 does not remove the genesis and mtxdma
drivers. To change the memory configuration, these need to be removed
manually using the instsrv (part of the NT Resource Kit, and located on c:\bin
in keck00). To remove these drivers, type:
- instsrv genesis remove
- instsrv mtxdma0 remove
To install the drivers (with 128MB for NT, 896MB for
capture), from the c:\genesis\drivers\nt4.0\i386
directory, type:
- mildrv mtxdma 917504 -pcmemorysize=1048576
- mildrv genesis
Note that you need to also update the c:\winnt\system32\genlib.dll file.
There are batch files available in c:\bin\drivers on Keck16 to check and
update the drivers:
- Run check_drivers.bat to see a listing of the drivers on all the Keck PCs
- Run install_drivers.bat to install the latest drivers on Keck PCs
To make setup of the PCs as easy as possible, we use disk cloning software
(DriveImage
Pro) to clone keck00 to keck01-keck15.
Step 1:
- Create Keck00.PQI image of KECK00 after booting with the green disk.
Step 2:
- Boot other systems with any of the other disks.
- Bootup with a disk loaded with network drivers
- Log on as Administrator
- "Cloner.bat" is called by autoexec.bat
- It runs 3link-id.exe from 3com -- that returns data about the card.
This data is stored in a temp file.
- This file is edited using a utility "textedit" to result in
a second file that contains only the mac address.
- Using a utility ("varset") that scans a lookup table to set
a dos variable.
- Then run a batch file (d:\sid\sid.bat) that deletes all existing
filesystems from the disk and copies the image KECK00.PQI to the system.
It then replaces the sid from the system.
- Some intermediate files are stored on \\KECK16\d\sid\logs
 To display a live
view from a camera:


